Hey guys, let’s cut to the chase – if you’ve ever worked on a bathroom remodel, basement tile job, or outdoor shower project, you’ve probably stared at two waterproof tile backer boards sitting next to each other, wondering how the hell to connect ’em without messing up that critical water-resistant barrier. As someone who’s spent the last 8 years sourcing, testing, and selling these boards (so basically I’ve glued, screwed, and taped way too many of these joints to count), I get this isn’t just a random “cut a board” step – mess this up, and you’re looking at water seepage, mold, and a whole lot of headaches later. Today I’m breaking down exactly how to do it right, no fancy tools or overpriced hacks needed, just stuff you can grab at most hardware stores. Waterproof Tile Backer Board
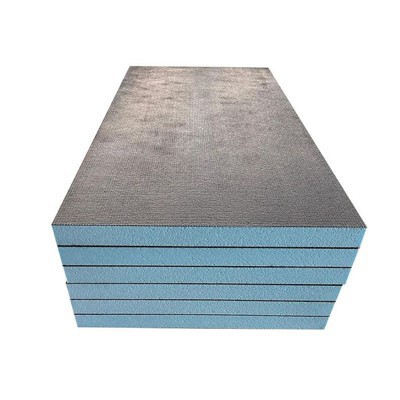
First, let’s make sure we’re all on the same page about what we’re working with. Not all backer boards are created equal, and that changes how you connect them. I sell cement-based waterproof backers (the most common for bathrooms and basements), fiber-cement ones, and even lightweight composite ones for smaller projects like accent walls. The basics are the same, but there are small tweaks I’ve learned over time from customers who tried cutting corners and ended up calling me at 2AM panicking about water damage. So we’re gonna focus on the standard edges – that flat, straight side that abuts the next board, not the cut edge of a board you just trimmed down (that’s a whole separate process, but we’ll touch on that briefly).
First step: Prep is non-negotiable, no exceptions. I’ve seen customers grab two boards, plop ’em next to each other and start taping, and wonder why their joint falls apart. Let’s start with cleaning. If your board has any dust, sawdust, or even that faint oil residue from the manufacturing process, it’ll keep the adhesive or tape from sticking. Grab a stiff bristle brush (a shop broom bristle works, or even a wire brush for cement boards) and scrub both the top, bottom, and the joint edge of both boards. Then wipe it down with a damp rag, not a soaking wet one – you just want to get rid of loose gunk, not soak the board. Pro tip here: if you’re working with fiber-cement boards that have a fibrous surface, lightly sand the joint edge with 80-grit sandpaper first to rough it up a little – that gives the adhesive something to grab onto, like how you rough up nail polish before adding a top coat.
Next, the joint itself: most people just butt two boards straight up against each other, and that’s fine, but wait – leave a tiny gap. Not a huge one, like 1/8 of an inch max. Why? Because backer boards move a little with temperature and humidity changes, especially in bathrooms that get steamy. If you butt them tight, they’ll push against each other and crack the tile later, or the gap will close up and trap moisture. Trust me on this – I had a customer last year who skipped this, and three months later their shower wall had a noticeable hump right where the two boards met. Fixing that meant ripping out all the tile, so don’t skip the 1/8 gap. If you’re working with uneven edges (you cut a board yourself and the edge isn’t perfectly straight), use a straightedge and a utility knife or jigsaw to trim it so it’s flush before you set it down. No one needs uneven joints that make tiling a nightmare.
Now, the actual connection part – this is where most people mess up. There’s two main ways to connect waterproof backer boards, and which one you use depends on your project, and honestly, what’s easier for you. Let’s start with the one I recommend 9 times out of 10: the thin-set mortar and fiberglass mesh tape method. Wait, I know, tape and mortar sounds basic, but it works – way better than screws alone, for one big reason: screws go through the board, and if you don’t seal that screw hole properly, water can seep through. But let’s walk through this step by step.
First, apply a layer of thin-set mortar – the waterproof kind, not regular mortar, this is key. Regular mortar doesn’t do squat against water. Grab a notched trowel (for backer boards, a 1/4-inch square notch works perfect) and spread a thin, even layer of mortar along the joint, across the top of both boards, about 2 inches on either side of the gap. Don’t overdo it – you don’t want it oozing everywhere and making a mess. Then, press your fiberglass mesh tape (make sure it’s specifically for backer boards, not drywall tape – drywall tape will fall apart when it gets wet) into the mortar. Smooth it out with your trowel, working from the middle of the joint outwards to get rid of any air bubbles. Then, apply a second, thinner layer of mortar over the top of the tape, enough to cover it completely. You shouldn’t be able to see the mesh at all when you’re done. Let that dry for at least 24 hours – I know, I know, you’re eager to tile, but rushing this step means the mortar won’t cure properly, and the joint will leak. I’ve had customers try to tile after 12 hours, and within a month, their shower had water damage behind the wall. Worth waiting the extra day, trust me.
The second method is using a waterproof joint compound specifically made for backer boards, and sometimes screws, if you’re working with a larger, taller wall. Wait, why add screws? If you’re doing a wall that’s over 4 feet high, the backer board can sag a little, so adding screws every 8 inches along the joint helps hold them in place. But here’s the thing: you have to use corrosion-resistant screws – stainless steel or galvanized, no regular wood screws. Regular screws will rust, and rust leaves stains on your tile later, plus they corrode and weaken the connection. When you drive the screws, don’t sink them too deep – just below the surface of the board, so the tape or compound can cover the hole. Once the screws are in, apply the same fiberglass mesh tape and thin-set mortar over the joint, covering the screw heads too. That way, the screw holes are sealed from water. I use this method for basement walls, since they’re taller and need a little extra support.
Now, let’s talk about what NOT to do, because I’ve seen so many people make these mistakes. First, don’t use regular drywall tape and joint compound for backer boards. Drywall tape isn’t waterproof, and it will crumble as soon as it gets exposed to moisture. I had a customer last year who used drywall tape in his basement bathroom, and after a year, the joint was gone, mold was growing, and he had to replace half the wall. Second, don’t skip the gap between boards. I mentioned this earlier, but it’s worth repeating – that tiny gap is for expansion, if you butt them tight, you’ll have problems. Third, don’t use construction adhesive to connect them as your only sealant. Construction adhesive might hold the boards together, but it doesn’t create a continuous water barrier. The tape and mortar (or joint compound) is what seals the joint, not the adhesive. Fourth, if you’re connecting backer boards for an outdoor project, like a patio tile or an outdoor kitchen counter, add an extra layer of silicone caulk along the joint after the mortar is fully cured. Outdoor projects get way more moisture and temperature swings, so that extra seal keeps water out way better.
Wait, what about edge treatments? Some backer boards have factory edges that are beveled or grooved, right? If your boards have a grooved edge, lining the grooves up with the next board creates a little channel – that’s actually a good thing, because you can fill that channel with mortar and tape, making an even stronger joint. That’s a common design on composite backer boards, so make sure you’re lining those grooves up properly, not just butting flat edges together. I always tell customers to check the manufacturer’s instructions, but from testing, lining those grooves gives you a 20% stronger joint, which matters a lot in high-moisture areas.
Another quick tip: if you’re connecting backer boards that are on opposite sides of a corner, like an inside or outside corner, don’t just miter the edge. For inside corners, overlap the boards by 2 inches, apply mortar and tape along both sides of the corner, not just one. For outside corners, you can use a metal corner bead that’s made for backer boards, or apply the tape and mortar in a V-shape along the corner. Again, seal that corner completely, because corners are the most common spot for water leaks – water runs down them, so if the joint isn’t sealed, it seeps right in.
Let me wrap this up with a quick step-by-step cheat sheet, so you don’t have to scroll back: 1. Prep the joint edge – scrub, clean, sand if needed, make a 1/8 gap between boards. 2. Apply thin-set mortar over the joint area, 2 inches on each side. 3. Press backer-specific fiberglass mesh tape into the mortar, smooth out bubbles. 4. Apply a second thin layer of mortar over the tape, covering it completely. 5. Let cure 24 hours minimum before tiling (48 hours for outdoor projects). 6. For tall walls, add corrosion-resistant screws every 8 inches along the joint, sealing the heads with mortar. 7. For outdoor or extra high-moisture areas, add a bead of waterproof silicone over the cured joint.
If you’re still not sure, or you’re dealing with a tricky project (like a custom shower niche or a sloped floor), just reach out. I sell these boards, and I’ve worked with hundreds of homeowners and contractors on getting joints right – don’t guess, get it done right the first time. If you have questions, or you want to pick up the right materials (I keep a stock of all the backer boards, mesh tape, and mortar you’ll need in one spot, so you don’t have to run around multiple stores), hit me up.
Now, quick refs for the science behind this, since I know some of you like the deep dive: American Society for Testing and Materials (ASTM) C1282 for backer board joint standards, and the Tile Council of North America (TCNA) Handbook for Ceramic Tile Installation, which is the go-to for all tiling and backer board guidelines. No fancy links, just those two, if you want to look up the official specs.
Waterproof Backer Board Happy tiling, and don’t let those joints give you grief down the line.
Address: Zhongze Village, Baohai Town, Tiantai County, Taizhou City, Zhejiang Province
E-mail: 906915688@qq.com
WebSite: https://www.yhhold.com/
