Hey everyone, and welcome back to the blog! Today I’m talking about something I’ve been deep in for the last decade—shaped rhinestones, specifically how to turn them into a killer mosaic pattern that doesn’t look like you just glued random gems down. For anyone who doesn’t know, I’m the owner of this small shaped rhinestones company, so I’m not here to sell you a generic tutorial I found on TikTok. This is all hands-on, trial-and-error stuff I learned while working with customers (and messing up way too many projects along the way). If you’ve ever stared at a bag of fancy shaped rhinestones—hearts, stars, hexagons, even weird little lightning bolts—and thought “how do I make these look intentional, not messy?” this one’s for you. Let’s dive in. Shaped Rhinestones

First off, let’s get one thing straight: shaped rhinestones aren’t your average round flatbacks. Round ones are easy—they tile like coins, no brainer. Shaped ones? Each has sides, corners, little nooks. That means your mosaic can be way more dynamic than the basic grid, but it also means you can accidentally leave huge gaps if you don’t plan ahead. I see this all the time: a customer buys a pack of 10mm clear heart rhinestones, slaps them all down on a phone case grid, and ends up with gaps the size of a pea between each heart. That’s not a mosaic, that’s a heart confetti disaster. So step one: prep your materials like you’re about to build something that doesn’t fall apart.
Let’s list what you actually need, no fancy craft store fluff. First, obviously, your shaped rhinestones. I can’t stress enough that not all shaped rhinestones are equal—we stock our stuff with high-quality foam backing that doesn’t peel after a week, and sharp, uniform edges that fit together way better than cheap knockoffs. If you’re using junk rhinestones, this tutorial won’t work, plain and simple. Next, your base: wood, canvas, a phone case, a denim jacket, whatever—just make sure it’s smooth enough for glue to stick. Then, tools: a pencil, a ruler, a fine-tip paintbrush (or a toothpick if you’re broke like I was when I started), strong craft glue (E6000 is my go-to, not that white school glue—trust me), and a pair of tweezers. Tweezers are non-negotiable. Trying to pick up a tiny 3mm star rhinestone with your fingers and not fumble it? Impossible. I still use tweezers daily, and I’ve been doing this for 10 years.
Now, the planning part. This is where most people skip ahead, and regret it. Let’s say you’re making a mosaic of a cat for a backpack, like my niece did last year. First, grab a reference image—not a blurry Instagram pic, a clear one you can zoom in on. Then, break that image down into shapes. Wait, shaped rhinestones are shapes, right? So your mosaic should be made of those same shapes, not random blobs. For the cat example: use small hearts for the paw pads, stars for the eyes, hexagons for the head fur, and tiny lightning bolts (wait, no, maybe triangles for whiskers—way better, that’s a shape we stock too) for whiskers. Here’s a pro tip I learned early: sort your rhinestones by shape and size first. Don’t just dump them all in a bowl. If your cat’s face needs 20mm hexagons, pull all the big hexagons out. If you need 5mm hearts for the nose, separate those. This saves so much time mid-project, when you’re not rummaging through a pile of mixed rhinestones like a squirrel looking for acorns.
Once you’ve got your shapes sorted, it’s time to map the pattern. You don’t have to be an artist here—stick to a light pencil outline on your base. For a simple project like a small coaster, I like to sketch a circle first, then mark where each rhinestone will go. For a more complex image, use a grid. Let’s say your base is 8×10 inches. Draw a 1-inch grid all over it. That way, each square is exactly the size you want your rhinestones to be. So if you’re using 1-inch hexagons, each square gets one hexagon. Wait, but how do you fit shaped rhinestones in a grid? Easy—you don’t force them. If a hexagon overlaps a grid line, that’s fine, it’ll look intentional. The key here is to leave no more than a 1/8-inch gap between any two rhinestones. I’ve seen people leave half-inch gaps and then fill them with paint, which defeats the whole point of a rhinestone mosaic. Those gaps catch dust, look cheap, and ruin the shine.
Now, let’s talk about the actual tiling process. This is where it gets fun, and where you can add your own flair. Let’s start with the center of your pattern, not the edges. Working from the middle out prevents you from getting stuck in a corner with no space to move. Take your tweezers, grab your first rhinestone, put a tiny dot of glue on the back (wait, if you’re using our shaped rhinestones, they have a peel-off backing—so just peel that and stick it straight on! No glue mess. That’s why we design them that way, trust me), and press it down firmly for 2-3 seconds. Don’t slide it—sliding will make it misalign and leave a gap. Next, pick the next rhinestone that fits. If you’re using hearts, turn some of them around upside down to break up symmetry. If you’re using hexagons, alternate the direction of each one—pointy up, pointy down, pointy up. That’s how you avoid that flat, boring grid look. I did a project for a wedding last year where we used star rhinestones for the backdrop, and alternating each star to face left or right made the whole thing look way more dynamic than if all stars faced the same way.
Wait, what about gaps? Let’s say you have a spot where a weird shape is left between two rhinestones. Don’t panic. That’s where smaller shaped rhinestones come in. We stock 2mm tiny shapes that are perfect for filling those tiny nooks. No need to cut a rhinestone (though I’ve done that too, if I really had to, but that’s more work). Another trick: if you have a round spot, use half-hearts or quarter-stars. That way, you don’t have to waste a whole rhinestone, and you get a custom fit. I know some people try to use grout for shaped rhinestone mosaics, but for smaller projects, grout is overkill. If you do get a tiny gap, a little bit of clear nail polish works as a sealant and filler. Just dab it on with a toothpick, let it dry, and it’s invisible.
Now, the mistakes I’ve made so you don’t have to. First, don’t use too much pressure when pressing down rhinestones. I once pressed so hard on a 15mm heart that it cracked in half, and I had to order a replacement from our stock (luckily, we always keep extra shapes on hand for this exact reason). Second, don’t rush the drying time. I stuck a project to my jacket the next day after gluing, and half the rhinestones fell off. Wait 24 full hours before handling or wearing your project. Third, don’t mix different types of rhinestones. Don’t mix our shaped glass rhinestones with cheap plastic ones—they shine differently, and one will look dull next to the other. I’ve seen that happen so many times, it’s like wearing a gold bracelet with a plastic ring. No.
Let’s do a quick example project to make this real. Let’s say you want a small mosaic mirror for your bathroom—10×10 inches. Here’s exactly what I’d do, step by step. First, get a plain wooden mirror frame (your base). Sort your shaped rhinestones: 20mm hexagons (black, for the outer border), 10mm hearts (pink, for the inner border), 5mm stars (silver, for the inside pattern). Next, sketch a 1-inch grid on the frame, leaving the center of the mirror clear. Peel the backing off the hexagons, stick them around the outer edge of the frame—one per grid square, pointy up and down alternating. Next, the inner border: stick pink hearts between each hexagon, pointing in and out so they fit snug. Now the inside of the frame: take silver stars, place them in a random but evenly spaced pattern, rotating each so no two face the same way. Fill any tiny gaps with 2mm silver triangles. Press all down for 3 seconds, let dry 24 hours. Done. That’s a mosaic that looks like you paid a professional, and it only takes a couple of hours to do.
Wait, what about larger projects? Like a mural for a wall? I’ve done a 4×8 foot mosaic for a local café a few years back. For that, I used wood panels as my base, sorted rhinestones by color and shape with big bins, and used a level to keep the pattern straight. The key for large projects is to divide it into sections. Do one 2×4 foot section at a time, so you don’t get overwhelmed. Also, take a step back every 15 minutes to look at your work—from a distance, gaps or misaligned shapes will jump out at you way more than they do up close. I can’t tell you how many times I fixed a wonky rhinestone after stepping back and realizing it looked off from across the room.
Now, let’s talk about keeping your mosaic looking good long-term. Shaped rhinestones are durable, but they’re not indestructible. For items you wear, like jackets or bags, avoid getting them wet if possible (though our rhinestones are water-resistant, not waterproof). For wall art, seal it with a clear acrylic spray once it’s fully dried. That protects the rhinestones from dust, scratches, and fading. I seal all my personal projects, and they still look brand new years later.
Here’s the thing: shaped rhinestone mosaics aren’t just for craft experts. They’re for anyone who wants to add a personal, shiny touch to something. I’ve had customers make birthday gifts for their friends, custom phone cases for themselves, even their kid’s backpacks for school. The best part? You can totally make mistakes, and they’ll look like intentional artistic choices. That’s the magic of this stuff.
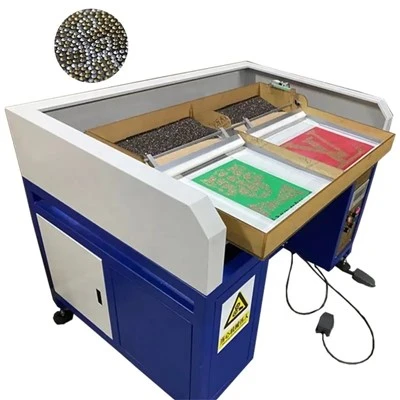
Now, if you’re ready to grab your shaped rhinestones and try this out—whether it’s your first mosaic or your 100th—reach out! We’ve got every shape, size, and color you could need, sorted and easy to work with, plus free tutorials for more complex projects. Just get in touch to chat about your next project, whatever it is.
Rhinestone Resin References:
- Craft Industry Alliance. (2022). Guide to Flatback Rhinestone Application for Mosaics.
- DIY Craft Magazine. (2021). Shaped Rhinestone Mosaic Techniques for Beginners.
- Local Artisans Collective. (2023). Best Practices for Decorative Rhinestone Projects.
Huayue Diamond (Shandong) Arts & Crafts Co., Ltd.
As one of the most professional shaped rhinestones manufacturers and suppliers in China, we offer a wide range of products with superior quality. Please rest assured to wholesale custom made shaped rhinestones at competitive price from our factory. Contact us for more cheap products.
Address: Ruibo Fuel Yard, Yinping Town, Yicheng District, Zaozhuang City, Shandong Province
E-mail: 52655731@qq.com
WebSite: https://www.hotfixchina.com/
